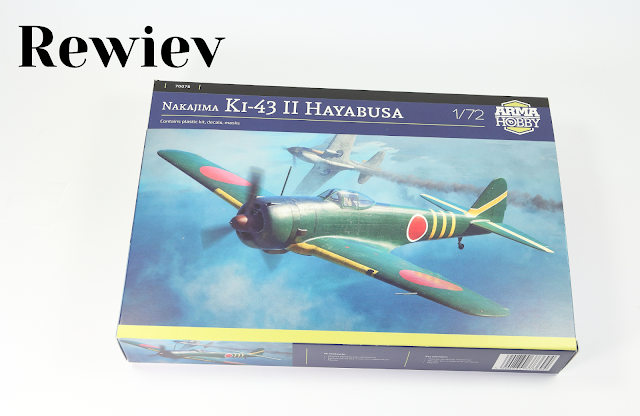
Nakajima Ki-43 II Hayabusa 1:72 Arma Hobby - Model rewiev
It must be admitted that in the past year, Arma Hobby didn’t exactly spoil fans of the 1:72 scale. Sure, a few new boxes with the brand's logo appeared on the market, but they were merely re-releases of well-known models, such as the P-51B or the iconic Hurricane. A bit monotonous, wouldn’t you agree? Fortunately, at the end of the year, in December 2024, the Warsaw-based manufacturer surprised modelers with a true novelty: the Nakajima Ki-43 II Hayabusa—a Japanese fighter straight from the Land of the Rising Sun.
70078 Nakajima Ki-43 II Hayabusa
The box maintains the aesthetic characteristic of Arma Hobby. The cover
features an eye-catching box art along with side views of three
painting schemes included in the set.
The contents of the box are in line with the manufacturer's standards. All components are packed in a plastic bag, and the set consists of three plastic sprues, a decal sheet, a canopy mask, and a clear assembly manual.
The model's parts are distributed across two gray sprues and one transparent sprue.
The larger sprue contains the main airframe components, such as the wings and fuselage. The parts are carefully designed and precisely molded; however, the panel lines are not as fine as those in the Mustang or Hayate kits. That said, there is a noticeable improvement compared to the P-39, where the surface quality felt somewhat lacking. For me, this is a positive sign.
The surface of the fuselage and wings is fairly plain, with minimal detailing. This is partly due to the characteristics of the aircraft itself, which featured a simple design. Additionally, most rivets and fasteners were omitted, which is accurate since the real aircraft didn’t have many. As a result, the panel lines appear somewhat too thick and slightly too pronounced in some areas.
While examining the parts, a noticeable number of flash catch the eye. The manufacturer explains this as a trade-off to achieve an appropriately thin vertical stabilizer. To properly mold such delicate parts, higher injection pressure was necessary, which unfortunately resulted in the flash. To me, this explanation seems reasonable, especially since the stabilizer is indeed as thin as a sheet of paper, which should add a sense of lightness to the finished model.
The flash is most noticeable around the stabilizer area, but removing it shouldn’t pose much difficulty. The only thing to watch out for is the antenna mount at the top of the stabilizer. It’s worth mentioning that guides are already available online showing how modelers handle this issue.
Another point worth noting is the presence of small blemishes on the underside of the wings. They look somewhat like damage to the mold. Fortunately, removing them is very straightforward and doesn’t require much effort.
Continuing the inspection of the sprues, the simplicity of this aircraft is evident in many areas. The cockpit also reflects this characteristic—with only a few elements replicated on the floor and walls, accurately representing the actual construction of the aircraft.
The remaining cockpit components have been designed as separate, delicate parts.
Some of these parts are so tiny that they can easily be overlooked or lost during assembly.
The pilot's seat is divided into two parts—the backrest is molded together with the bulkhead, while the seat itself is a separate piece.
Combined with the included decal, it should meet the expectations of even the most demanding modeler.
It's also worth mentioning the gunsight. The manufacturer provides it in two versions: one made of transparent plastic and another from standard gray plastic, offering modelers additional options to choose from.
Moving toward the nose of the aircraft, it’s worth pausing for a moment to appreciate the engine, which will undoubtedly be one of the most striking features of the finished model. Unfortunately, carefully removing all the small flash marks may pose a bit of a challenge.
Arma Hobby has long focused on modularity and the ability to build different variants of a given aircraft. This time is no exception—the kit includes two types of exhaust manifolds. In both cases, it’s worth enlarging the openings for a more realistic appearance.
Depending on the chosen version of the model, modifications to the engine cowling will be necessary. The manufacturer has simplified this process by pre-cutting the appropriate areas on the reverse side of the part.
Additionally, the panels behind the engine cowling are also designed in two variants, providing greater flexibility during assembly.
The engine cowling consists of six parts. On the one hand, I’m pleased that this approach preserves the details in every area. On the other hand, it raises some concerns about assembling everything symmetrically so that the panel lines don’t stand out. This will undoubtedly require dry fitting and precise assembly. Following the assembly sequence outlined in the instructions will be crucial in this case:
Additionally, the top of the cowling includes a separate insert with machine guns, allowing for better detail representation.
The pylons for the fuel tanks and bombs are designed in an interesting way. The mounts are placed along the axis of the pylon and need to be rotated 90 degrees before assembly. The pylons themselves are rich in detail, adding realism to the model.
The only underwing stores included are fuel tanks.
Some details only caught my eye after several inspections of the sprues. For instance, the flaps to be mounted under the wings near the main landing gear struts are marked with “left/right” indicators, which significantly simplifies assembly.
As for the landing gear, unfortunately, the wheels are not particularly impressive in terms of aesthetics—though the blame lies with the aircraft’s designers, not the model
The well-designed main landing gear struts require some work to remove the flash but should look great once assembled.
The landing gear covers stand out with their thin walls, which is impressive for this scale.
As a final touch, there’s the tail wheel—so tiny that it’s hard to spot on the sprue.
The kit also includes other small parts, such as the previously mentioned flaps and the headrest, which serves as an anti-flip support.
The canopy also looks very good—the walls are thin, and the transparency is excellent. Unfortunately, due to its shape, the glass slightly distorts the view.
In addition to the plastic parts, the kit includes decals and masks, which, as usual with Arma Hobby, are top-notch. The masks are made from Kabuki tape and allow for precise protection of the canopy, main wheels, and tail wheel.
The decals were printed by Techmod and are of high quality. However, the straightforward design of the markings might inspire more experienced modelers to create them using custom-cut masks.
Additionally, Arma Hobby continues its policy of providing designs for 3D-printable accessories. On the first page of the instruction manual, there’s a QR code linking to files that can be downloaded and printed. For preorders, it was also possible to order these components as ready-made prints. Among the available accessories are items such as a bulkhead with the pilot's seat, two types of exhaust manifolds, a radiator, and a gunsight.
As mentioned in the introduction, the manufacturer has prepared three painting schemes. Each one is varied and interesting.
The second painting scheme is particularly intriguing and striking, although its execution requires exceptional precision. The mottled pattern on the aircraft's surface presents a significant challenge for modelers. Additionally, the manufacturer recommends applying the red decal on the vertical stabilizer before the final assembly of the horizontal stabilizers to the fuselage. This approach demands great care and accuracy. It seems that painting these sections using masks might be easier than applying decals. The same applies to the yellow quick-identification stripes.
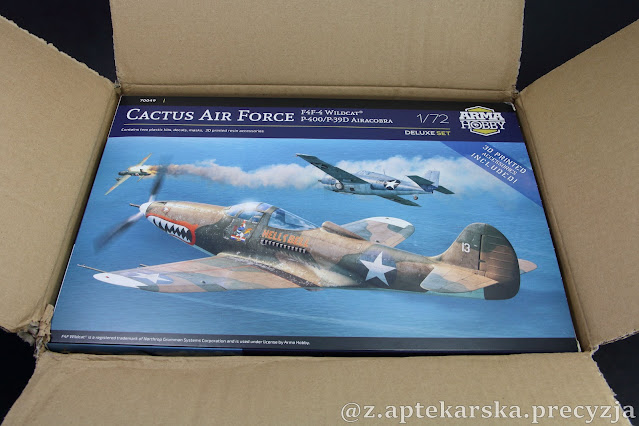
So, having presented the entire contents of the box, it’s time for a few closing words. I must admit, I had mixed feelings about this release, especially as a fan of 1:72 scale models. Arma Hobby's decision to switch tooling was a bold move but caused some disruptions, which affected the quality of the P-39 sprues. While it’s not a bad model, it does require more effort compared to the manufacturer’s earlier kits. After the spectacular Hurricane, many modelers felt disappointed that the Airacobra turned out to be “just” good. It’s understandable that this drop in quality sparked extensive discussions, especially since price is an inevitable topic in such debates. However, as the saying goes, “the days of cheap are long gone.”
The switch in tooling was implemented due to the limitations of the previous setup and, as I’ve learned, will enable Arma Hobby to release more models at a faster pace and, potentially, at more competitive prices. Unfortunately, this change has temporarily impacted quality, but I hope it’s only a transitional issue. That said, I initially feared that the Hayabusa would be closer in quality to 1990s Airfix kits than to what we’ve come to expect from the manufacturer in recent years. Thankfully, the reality isn’t nearly as bleak. True, the panel lines lack the finesse of those on the Mustang, and the number of flash marks might deter less experienced modelers, but the kit has undeniable strengths. It’s clear that the quality has improved compared to the P-39, and the abundance of Hayabusa build logs appearing online shows that the model has garnered significant interest. Moreover, as I write this, photos of the first completed builds from this kit are already available—and they look truly promising.
I’m also pleased that, thanks to the new tooling setup, Arma Hobby has announced plans to release at least two entirely new 1:72 scale models this year, with the goal of introducing four new models annually in the future. By comparison, the limitations of the previous tooling meant that the Hayabusa spent three years in development before it could be released! I’m keeping my fingers crossed for future releases and believe that things will only get better from here!
Thanks for reading! Z Aptekarską Precyzją - Models&Reviews
.png)
.jpg)
.jpg)
.jpg)
.jpg)
.jpg)
.jpg)
.jpg)
.jpg)
.jpg)
.jpg)
.jpg)
.jpg)
.jpg)
.jpg)
.jpg)
.jpg)
.jpg)
.jpg)
.jpg)
.jpg)
.jpg)
.jpg)
.jpg)
.jpg)
.jpg)
.jpg)
.jpg)
.jpg)
.jpg)
.jpg)
.jpg)
.jpg)
.jpg)
.jpg)
.jpg)
.jpg)
.jpg)
.jpg)
.jpg)
.jpg)
.jpg)
.jpg)
.jpg)
.jpg)
.jpg)
.jpg)
.jpg)
.jpg)
.jpg)
.jpg)
.jpg)
.jpg)
.jpg)
.jpg)
.jpg)
.jpg)
.jpg)
.jpg)
.jpg)
.jpg)
.jpg)
.jpg)
.jpg)
.jpg)
.jpg)
.jpg)
.jpg)
.jpg)
.jpg)
.jpg)
.jpg)
.jpg)

.jpg)
.jpg)


.png)
Comments
Post a Comment