Arma Hobby really made us wait a long time for this new release. The first announcements appeared quite a few years ago — if my memory serves me right, it was shortly after the debut of the Mustang B/C version, around 2022. In the meantime, there were even some doubts about whether this model would ever see the light of day. After all, Eduard already has a Mustang in the same scale on the market.
However, Arma Hobby surprised everyone by finally releasing their own “little pony” — the Mustang D. So the question remains: after some recent issues with sprue quality, does this kit live up to the earlier Mustang B/C? Or perhaps history has come full circle again, and we’re looking at another step forward, just like last time? Has the manufacturer introduced any unexpected design solutions?
I’ll try to answer these questions in this article.
This review will be a little different from the previous ones. First, I plan to go through most — if not all — of the kit’s parts step by step, following the instruction manual. Second, since I intend to build this Mustang, the review will also include photos from the build, especially of the cockpit interior.
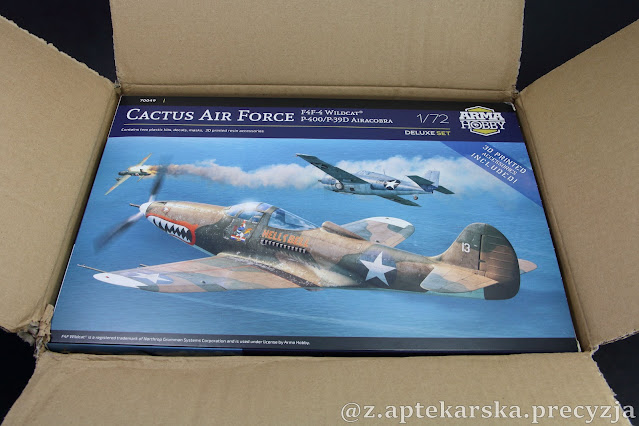
But before we go any further, as is tradition — a quick look at the back of the box and its contents.
.png)
Let’s move straight to the instruction manual which — as usual for Arma Hobby — comes in the form of a small booklet.
On the first page, you’ll find a QR code and a link leading to a website where you can download a free 3D-printable file containing several small details. For modelers who don’t own a 3D printer, the manufacturer offered a pre-order option with the printed parts included. These kinds of promotions appear regularly, so it’s worth keeping an eye on the news section of the Arma Hobby website.
The following assembly steps are presented clearly and logically. The color printing not only highlights the key moments of construction but also helps with painting the cockpit interior.
As usual, the build begins with the pilot’s cockpit — the fuel tank, seat, and control stick.
Here’s how these parts look in plastic:
The pilot’s seatbelts are provided as decals:
The next assembly step is adding the various components mounted above the fuel tank. This is where the characteristic Arma Hobby level of dense, highly detailed parts really begins to show.
You can also see that decals are provided for these details.
.png)
.png)
You can also see other cockpit components in the photo — parts 71, 60, and 64. The level of detail Arma Hobby has achieved in this scale is truly impressive — the amount of fine detail is astonishing.
The next step in the build is assembling the instrument panel and control pedals. Despite their small size, both elements are very well reproduced, especially the instrument panel, which will look highly realistic once painted and finished with decals.
On the right, there is another small cockpit component, part no. 34 — the throttle lever.
.png)
The next stage of the build involves further completing the cockpit interior. At this point, you also need to install the tail wheel along with its bay and glue in the tail gear well doors. It’s worth paying attention to the precise alignment of these parts — their correct positioning is important not only for the overall appearance but also for ensuring a proper fit when joining the fuselage halves.
The radiator has a nicely represented mesh texture:
At this point, it's worth taking a look at the inside surfaces of the fuselage halves. Most of the interior details have been designed as separate parts, which in my opinion has at least two important advantages. First, this approach eliminates the sink marks that appeared in the B/C version. Second, it gives the modeller more freedom — certain elements can be omitted to better match the interior to the specific aircraft variant being built.
As I mentioned at the start of the article, the model went straight to the workbench, so now it’s time to show the results of the first build steps. In the photo below, you can see all the cockpit parts that will be used to recreate the Mustang’s interior.
And after painting:
.jpg)
I should mention here that I used a 3D-printed seat.
.jpg)
.jpg)
It’s worth mentioning here that the interior of this model is literally covered in decals. This is a characteristic feature of kits from this manufacturer, and I really like it. The Techmod decals are printed to the highest standard, and combining them with the plastic details produces a far more impressive effect than, for example, flat pronted photo-etched parts.
.png)
Here’s how these decals look on the cockpit details:
.jpg)
.jpg)
.jpg)
And after placing everything in its proper position:
.jpg)
.jpg)
.jpg)
Finally, the entire interior assembled dry. I also added a small detail — the wires running from the battery to the radio.
Now, let’s get back to the review. Speaking of decals, the landing gear bay stands out as an interesting solution. This area requires a lot of patience from the modeller due to its demanding painting. Most of the sheet metal surfaces remain unpainted, but the rivet areas need to be covered with Zinc Chromate Yellow, which requires extensive masking. Here, the manufacturer took a step forward and provided silver decals that should be applied to the bay after painting the entire surface with the anti-corrosion primer color.
The landing gear bay itself looks like this:
At this point, the manufacturer implemented an interesting solution regarding the division of parts within the landing gear bay. In the B/C Mustangs, the ribs molded together with the wing often caused sink marks to appear on the wing surface.
Before attaching the wing, you also need to glue in the spar and the central bulkhead.
Before joining the wings, we need to decide how to handle the navigation lights. Should we leave this detail as it is — molded together with the wing — or drill holes and insert a clear part?
Here’s how this detail looks in gray plastic:
On the inner side of the wing, pre-milled holes have been provided, which the modeller can drill out if they plan to install a clear part in this location. This is a practical solution that allows the kit to be adapted to the chosen variant without risking damage to delicate details.
.png)
The clear part itself is quite small — it’s located next to another tiny piece, the camera lens. This could suggest that Arma Hobby may plan to release a reconnaissance version of the Mustang in the future.
When inspecting the inner side of the wings, two interesting details stand out. First — the recessed surfaces in the weapon bays suggest that future accessories may be released to enhance the model with fully detailed armament bays, possibly in the form of 3D-printed parts. Second — the lower wing half features numerous mounting points for external stores, including positions that could indicate the potential for carrying rockets used during the Korean War.
.png)
The outer surfaces of the wings have been treated in a very thoughtful and unconventional way. On real Mustangs, the wings were often filled and smoothed to improve the aircraft’s aerodynamic properties. As a result, panel lines and rivets were almost invisible — only the inspection panels and weapon bays stood out on the smooth surface.
The manufacturer decided to combine historical accuracy with an attractive model appearance. Panel lines that were originally filled are here only subtly indicated — they’re difficult to capture even in photographs but are faintly visible on the model, creating a very realistic effect. The inspection panels and weapon bays, on the other hand, are reproduced in the classic way, with clear panel lines. Additionally, the center wing section around the air intake to the radiator, which was not filled on the real aircraft, features visible rivets.
.png)
.png)
.png)
.png)
.png)
Finally, it’s worth mentioning the last wing component — the flaps. They have been designed as separate parts and are shown in the lowered position. Once again, Arma Hobby focused on historical accuracy — most Mustangs seen in archival photos have their flaps set this way.
There are two explanations for this phenomenon. The first is that when the engine was shut down, hydraulic pressure dropped, causing the flaps to fall automatically. The second suggests that pilots intentionally left the flaps in this position — this procedure was included in the operating manuals to prevent ground crew from accidentally stepping on and damaging them.
It’s a small but very characteristic detail that adds realism to the model, making it look natural and true to life even at the construction stage.
The flaps themselves are excellently designed — full of small details, including both recessed and raised rivets, which enhances their realism. They look very convincing straight out of the sprue. Moreover, a modeller with moderate experience can modify them without much difficulty if they wish to display the flaps in the raised position. This is a well-thought-out feature that gives flexibility in how the finished model is presented.
.png)
.png)
Since we’ve already talked about the wing surfaces, it’s worth taking a closer look at the fuselage, which is really impressive. The panel lines are subtle but clear, and around the panels, you can see lightly indicated fasteners and individual rivets. The only minor drawback is the lack of full fuselage rivets. On the other hand, this has its advantages — personally, I prefer to add rivets myself rather than deal with excessively deep rivets, as is often the case in models from some other manufacturers.
Following the instructions, we now reach the stage of assembling the tail surfaces. Here, the first significant choice must be made — the manufacturer provides two versions of the vertical stabilizer: with a dorsal fin (the “fillet”) or without it. Additionally, the kit includes two variants of the horizontal stabilizers — one with fabric-covered elevators and the other in a metal version. This demonstrates the kit’s versatility, allowing the modeller to recreate different Mustang D variants and tailor the model to the specific aircraft they want to represent.
Additionally, the fin is provided in two versions, differing in the placement of the panel line.
We are slowly approaching the end of this virtual Mustang build. In the next stages, all that remains is to join the fuselage with the wings and add a series of small details. Once again, the large number of optional parts stands out, allowing the model to be customized for different aircraft versions and configurations.
The panel located under the engine has been designed in two versions:
And the small side panels of the engine are available in three variants:
The next stage of the build involves assembling the landing gear. Here again, Arma Hobby pleasantly surprises — the manufacturer has included a very practical feature. On the sprue with the clear parts, you’ll find a simple but clever stand that makes it easier to correctly position and assemble the landing gear struts. It’s a smart yet straightforward idea that will definitely make life easier for modellers.
The tires look really good — they feature carefully reproduced tread that appears very natural. The downside, however, is a fairly large sprue attachment point, which will require some tread restoration after removal. The tires themselves have subtle, realistic sagging, adding authenticity to the model. The wheel hubs also look very convincing — although more advanced modellers might opt to replace them with 3D-printed parts, the difference in quality is not significant.
The landing gear struts have small flash in some areas, which may take a bit of time and patience to remove. It’s worth doing this to achieve a cleaner and more realistic result. The gear doors, on the other hand, have rather thick walls — gently thinning them before assembly would greatly improve their appearance and add a sense of lightness to the overall structure.
We’ve practically covered the entire model — there are very few parts left to discuss and even fewer photos to show. The final steps in the instructions involve the finishing assembly: fitting all the small details, closing up the fuselage, and preparing the aircraft for painting. This is the stage where the Mustang truly begins to take its final shape and character.
.png)
.png)
The two different spinners and two types of propellers make it possible to easily build a P-51K variant from this kit as well. Interestingly, the Mustang K is currently available for pre-order on the Arma Hobby website.
.png)
The exhaust manifolds require a bit of work — to make them look right, it’s worth drilling out the openings. Alternatively, you could use resin aftermarket parts.
The instrument panel cover is also available in two versions:
Since the instructions have reached the canopy assembly stage, it’s worth taking a closer look. The clear parts are of very high quality — thin, transparent, and free of visible surface distortions. Unfortunately, due to their curved, spherical shape, they slightly distort the view, which is perfectly understandable at this scale. A bit of polishing or a soak in Sidolux will certainly help bring out the full clarity and depth of the glass.
.png)
.png)
The clear sprue serves one more very clever purpose. It’s designed in such a way that it can be turned into a practical stand that helps with the proper alignment of the landing gear and later makes transporting the finished model much easier. A brilliant idea!
The manufacturer has also included a small box with canopy masks, cut from kabuki paper. This is a practical addition that makes painting much easier. For the sake of completeness and documentation, here’s a photo:
The final stage is the assembly of the underwing stores, with options including fuel tanks and bombs:
And here are a few more photos that didn’t make it in earlier:
The smallest part I found — a mirror:
.png)
.png)
.png)
.png)
.png)
All the plastic parts are now behind us, so it’s time to take a closer look at the decals and the painting schemes included in the set. As I mentioned earlier, the decals are printed to a very high standard and look excellent.
The only issue I noticed on my copy was slightly misaligned colors on the swastikas, decals 12 and 12
.png)
Regarding the paint schemes, we get three interesting options: two American and one British Mustang:
And with that, I’ve reached the end of the overview for another kit released by Arma Hobby. I must admit, I had some concerns about what I would find inside, but I can sum up the model in one sentence – it doesn’t disappoint! What’s more, the designer has once again surprised us with several unusual and well-thought-out solutions that will surely make building this Mustang easier. How will they perform in practice? I plan to find out very soon during the build!
The review sample was provided by manufacturer - Arma Hobby
Thanks for reading! Z Aptekarską Precyzją - Models&Reviews
PS If you like what I do you can buy me a coffee on
buycoffee.to.
.jpg)
.png)
.png)
.png)
.png)
.png)
.png)
.png)
.png)
.png)
.png)
.png)
.png)
.png)
.png)
.png)
.png)
.png)
.png)
.png)
.png)
.png)
.png)
.png)
.png)
.png)
.png)
.png)
.png)
.png)
.jpg)
.jpg)
.jpg)
.jpg)
.png)
.png)
.png)
.jpg)
.jpg)
.jpg)
.jpg)
.jpg)
.jpg)
.jpg)
.jpg)
.png)
.png)
.png)
.png)
.png)
.png)
.png)
.png)
.png)
.png)
.png)
.png)
.png)
.png)
.png)
.png)
.png)
.png)
.png)
.png)
.png)
.png)
.png)
.png)
.png)
.png)
.png)
.png)
.png)
.png)
.png)
.png)
.png)
.png)
.png)
.png)
.png)
.png)
.png)
.png)
.png)
.png)
.png)
.png)
.png)
.png)
.png)
.png)
.png)
.png)
.png)
.png)
.png)
.png)
.png)
.png)
.png)
.png)
.png)
.png)
.png)
.png)
.png)
.png)
.png)
.png)
.png)
.png)
.jpg)
.png)
.png)
.png)
.png)
.png)
.png)
.png)
.png)
.png)
.png)
.png)
.png)
.png)
.png)
.png)
.png)
.png)
.png)
.png)
.png)
.png)
.png)
.png)


Comments
Post a Comment